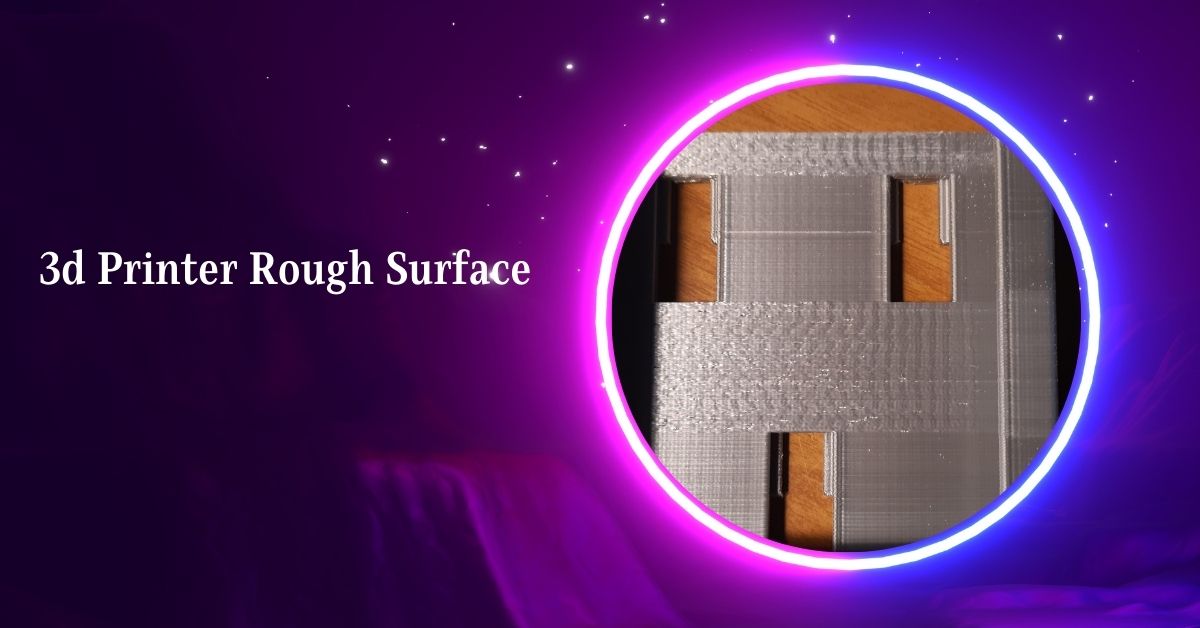
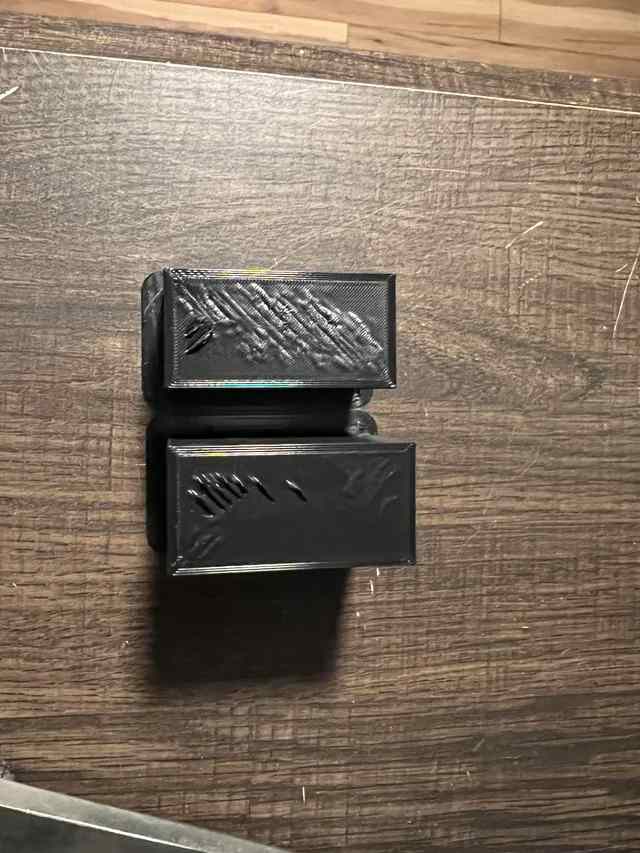
3D printing is a versatile and revolutionary technology, yet it often presents challenges, one of the most common being rough surfaces.
Rough surfaces in 3D prints can result from over-extrusion, wet filament, or printing too hot. Ensuring the nozzle isn’t too close to the bed and adjusting extrusion settings can help achieve smoother prints.
Here, we’ll explore common causes of rough surfaces in 3D prints and provide actionable solutions to achieve the desired smoothness.
Common Causes of Rough Surfaces
Over-Extrusion and Under-Extrusion:
- Over-extrusion occurs when too much filament is extruded, resulting in excess material that creates bumps and irregularities. Adjusting the extrusion multiplier in your slicer settings can help mitigate this issue.
- Under-Extrusion: Insufficient filament flow can cause gaps and weak layers. Ensure the filament diameter matches the printer’s settings and increase the extrusion multiplier if necessary.
Inadequate Cooling:
Proper cooling is crucial for solidifying layers correctly. A cooling fan at 100% speed helps for materials like PLA, whereas ABS and PETG benefit from minimal cooling to avoid warping. Custom fan ducts can improve airflow distribution.
Printing Speed and Temperature:
- High printing speeds can lead to inaccuracies and rough surfaces. Slowing down the speed, especially for top layers, can enhance surface quality.
- Printing temperature also affects surface finish. High temperatures can cause filaments to sag, while too low temperatures can lead to poor layer adhesion. Conducting temperature tests for your specific filament can optimize results.
Support Structures and Overhangs:
- Rough surfaces often appear where support structures meet the model. Adjusting the support Z-distance in slicer settings can improve the separation between supports and the model, making removal easier and reducing surface imperfections.
- For overhangs, printing at angles less than 45 degrees or using optimized support settings can prevent sagging and roughness.
Layer Height and Extrusion Width:
Reducing layer height can improve surface smoothness by creating finer layers. Similarly, decreasing the extrusion width in slicer settings can minimize visible layer lines.
Techniques for Improving Surface Finish
Sanding and Polishing:
Post-processing methods like sanding can significantly smoothen surfaces. Starting with coarse sandpaper and progressing to finer grits, followed by polishing, can achieve a glossy finish.
Chemical Smoothing:
Solvents like acetone for ABS or isopropyl alcohol for PVB filaments can dissolve the outer layer, smoothing the surface. However, these methods require proper safety measures due to the chemicals’ hazardous nature.
Surface Coatings:
Applying XTC-3D epoxy or specialized 3D Gloop coatings can fill in surface imperfections and provide a smooth, protective layer. These coatings should be applied in well-ventilated areas with appropriate protective gear.
Advanced Slicer Settings:
Features like “Monotonic Top/Bottom Order” and “Ironing” in slicers like Cura can enhance the top layer finish by ensuring continuous extrusion and smoothing the outer surface.
Segmented Printing:
For complex models, printing in segments and assembling them afterwards can reduce the need for support and improve surface quality. Each segment can be printed with optimal settings and then glued together seamlessly.
Adjusting Print Orientation:
Reorienting the model to minimize overhangs and optimize airflow from cooling fans can lead to better surface finishes. Positioning the model strategically can take advantage of the printer’s capabilities and cooling system.
Regular Maintenance:
Ensuring your printer’s mechanical parts are well-lubricated and debris-free can prevent mechanical issues that lead to surface roughness. Regular calibration and maintenance are essential for consistent print quality.
Surface Roughness Metrics and Their Importance
Understanding surface roughness metrics such as Ra (average roughness) and Rz (mean peak-to-valley height) can help evaluate and improve the quality of 3D prints. Different post-processing techniques can significantly reduce these values, leading to smoother surfaces and better functional properties.
Measurement of Surface Roughness:
Utilizing tools like profilometers to measure Ra and Rz values can provide quantitative data on the smoothness of 3D printed parts.
Impact of Material Choice on Surface Roughness:
Different materials and printing technologies produce varying levels of surface roughness. For instance, due to their different material properties and printing processes, SLA and DLP prints generally have smoother surfaces than FDM prints.
Optimizing Printing Speed
How Speed Influences Surface Texture
Slower printing speeds usually produce better surface quality because the extruder can accurately lay down the filament.
Ideal Speed Settings for Different Materials
Different materials have different optimal printing speeds. For example:
- PLA: 30-60 mm/s
- ABS: 40-60 mm/s
- PETG: 20-40 mm/s
Adjusting Speed for Complex Prints
Reducing speed can significantly improve the surface finish for intricate designs. It allows the printer to handle details with greater precision.
Temperature Settings
Role of Temperature in Print Quality
Temperature directly affects filament flow and layer adhesion. Proper temperature settings ensure a smooth and even extrusion.
Finding the Right Temperature for Your Filament
Most filaments come with recommended temperature ranges. Start within this range and adjust based on the print quality you observe.
Common Temperature-Related Issues and Solutions
- Stringing: Reduce temperature or enable retraction.
- Poor Adhesion: Increase temperature or improve bed adhesion techniques.
Layer Height Adjustments
Understanding Layer Height and Its Effects
Layer height is the thickness of each layer in your print. Lower heights mean finer details but longer print times.
Recommended Layer Heights for Smooth Surfaces
- Fine Detail: 0.1mm
- Standard Quality: 0.2mm
- Fast Printing: 0.3mm
Balancing Detail and Smoothness
Choose a layer height based on the required detail and acceptable print time. A lower layer height provides the best surface finish.
Printer Calibration
Importance of Proper Calibration
Calibration ensures that your printer components are correctly aligned and functioning optimally. This reduces errors and improves print quality.
Steps to Calibrate Your 3D Printer
- Bed Leveling: Ensure the print bed is level.
- Extruder Calibration: Verify the extruder is extruding the correct amount of filament.
- Axis Calibration: Check that all axes move correctly and are properly aligned.
Troubleshooting Calibration Problems
- Uneven Layers: Re-level the bed.
- Extrusion Issues: Recalibrate the extruder.
- Axis Misalignment: Realign and tighten axis components.
FAQs
1. Why is my 3D printer leaving a rough surface?
Rough surfaces can result from over-extrusion, inadequate cooling, high printing speeds, or improper support structures. Adjusting extrusion rates, optimizing cooling, and fine-tuning printing settings can mitigate this issue.
2. How do I smooth my surface when 3D printing?
To smooth 3D-printed surfaces, use techniques like sanding, chemical smoothing with solvents, applying surface coatings, or adjusting advanced slicer settings like “ironing” to improve top-layer finishes.
3. Why is my 3D print surface not smooth?
Factors such as incorrect extrusion rates, inadequate cooling, high printing speeds, improper support structures, or insufficient layer height can cause uneven surfaces. Adjusting these settings can help achieve smoother prints .
4. What is surface roughness in 3D printing?
Surface roughness in 3D printing refers to the texture of the printed part’s surface, quantified by measurements like Ra (average roughness) and Rz (mean peak-to-valley height). Lower values indicate smoother surfaces.
5. Is higher surface roughness better?
Higher surface roughness generally indicates a rougher, less smooth surface, which is typically undesirable for most applications. Lower surface roughness is preferred for better aesthetic and functional properties.
6. What is the ideal surface roughness?
Ideal surface roughness depends on the application,, but lower values (e.g., Ra < 5 µm) are generally preferred for better aesthetics and functionality. Post-processing techniques can help achieve these values.
7. Rough surface when printing
Rough surfaces during printing can result from over-extrusion, high printing speeds, inadequate cooling, or incorrect support settings. Adjusting these parameters can help achieve a smoother finish.
8. Rough surface finish on Mini 3D prints; what’s wrong?
Mini 3D prints may have rough surfaces due to overheating, high speeds, or insufficient cooling. Smaller models benefit from lower temperatures, slower speeds, and improved cooling to prevent rough finishes .
9. Rough surface, and can’t fix it
Persistent rough surfaces may require checking for mechanical issues, ensuring proper lubrication, and calibrating the printer. Experimenting with different settings and regular maintenance can help resolve this issue.
10. Rough surface after first layer issue
Rough surfaces after the first layer often indicate bed levelling or adhesion problems. Ensuring a well-leveled bed and using appropriate bed adhesion aids like glue sticks or tape can improve surface quality.
Final Words
Achieving smooth surfaces in 3D printing involves understanding and addressing issues like over-extrusion, cooling, and printing speeds. Regular printer maintenance, proper calibration, and optimizing settings based on material and model specifics are key to preventing rough surfaces and enhancing print quality.