In most office and home setups, printers are usually connected through a router to enable multiple devices on a network to access them wirelessly or via Ethernet. However, there might be situations where you need to connect a printer directly to a computer using an Ethernet cable without the involvement of a router.
Connect your printer directly to a computer using an Ethernet cable by configuring both devices with static IP addresses in the same range, installing necessary drivers, and disabling Wi-Fi on the printer for a stable connection.
This guide will walk you through the steps necessary to establish a direct Ethernet connection between your printer and computer.
Why Connect Directly Without a Router?
Connecting your printer directly to your computer using an Ethernet cable can have several advantages:
- Increased Security: Since the connection is direct, there’s no risk of unauthorized access via Wi-Fi or another network.
- Faster Setup: You don’t need to configure any networking equipment or deal with potential wireless interference.
- Enhanced Privacy: Your printer is only accessible to the connected computer, reducing the chances of unwanted access.
What You Need
Before you start, make sure you have the following:
- An Ethernet cable: A standard Ethernet cable will do. Ensure it’s long enough to connect the printer and the computer comfortably.
- A printer with an Ethernet port: Most modern printers have Ethernet ports. Check your printer’s manual if you’re unsure.
- A computer with an Ethernet port: Most desktops and some laptops come with Ethernet ports. If your computer doesn’t have one, you may need an Ethernet to USB adapter.
Step-by-Step Guide
1. Check the Printer’s Network Settings
Before connecting the printer, it’s important to ensure that it’s configured to accept a direct Ethernet connection:
- Power on the Printer: Ensure the printer is turned on and fully booted.
- Access Network Settings: Depending on your printer model, navigate to the network settings menu. This can usually be found through the printer’s touchscreen interface or control panel.
- Set the IP Address: Assign a static IP address to the printer. This IP address should be in the same range as the IP address of the computer to which it will be connected. For example, if your computer’s IP address is 192.168.1.2, you might set the printer’s IP to 192.168.1.3.
- Disable Wi-Fi (if necessary): To avoid any interference, it may be a good idea to disable Wi-Fi on the printer.
2. Configure the Computer’s Network Settings
Next, you’ll need to configure your computer to communicate with the printer via the Ethernet cable:
- Open Network Settings: On your computer, navigate to the network settings. On Windows, this can be found in the Control Panel under “Network and Sharing Center.” On a Mac, it’s under “System Preferences” > “Network.”
- Set a Static IP Address: Configure your Ethernet adapter with a static IP address. This should be in the same range as the printer’s IP address. If your printer’s IP is 192.168.1.3, set your computer’s IP to 192.168.1.2. Ensure the subnet mask is 255.255.255.0 and leave the default gateway blank.
- Disable Other Network Connections: If possible, disable other network connections (such as Wi-Fi) to ensure that your computer is only communicating through the Ethernet connection.
3. Connect the Printer to the Computer
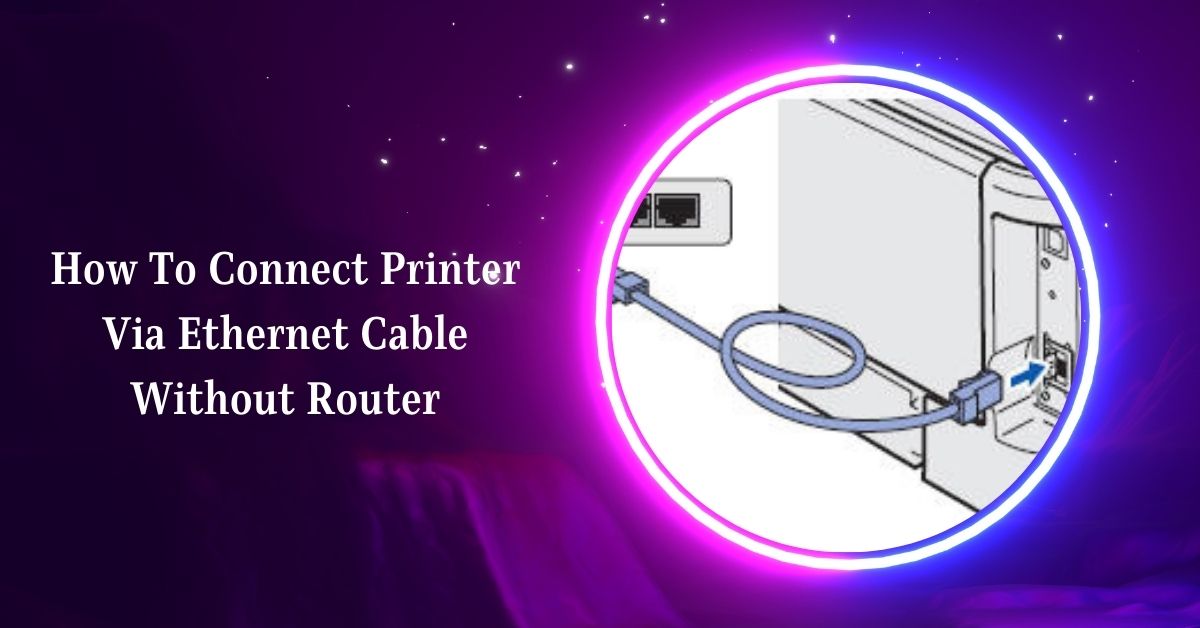
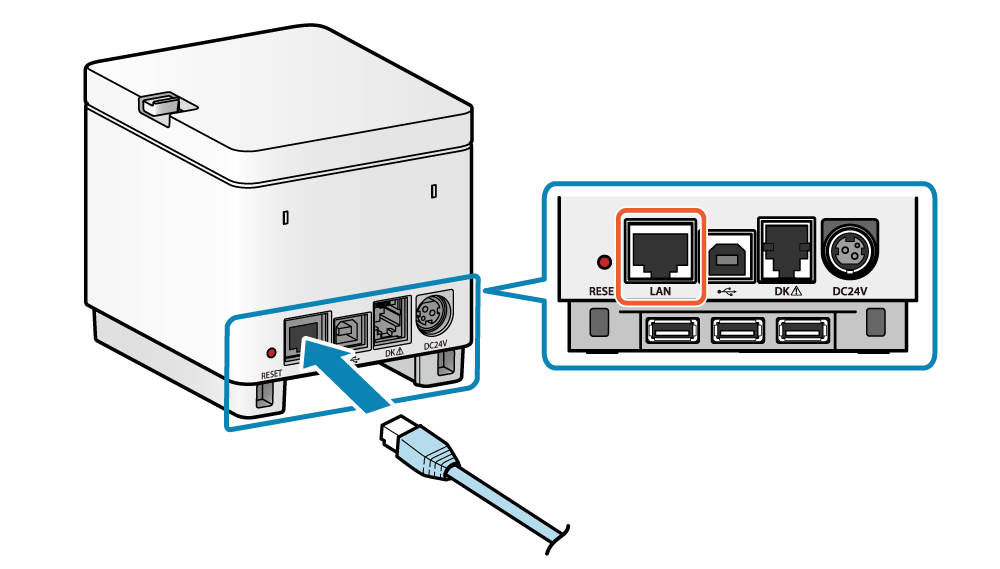
- Plug in the Ethernet Cable: Connect one end of the Ethernet cable to the printer and the other end to the computer’s Ethernet port.
- Wait for the Connection: It may take a few moments for the devices to recognize each other. Check your printer’s display to see if it acknowledges the connection.
4. Install Printer Drivers
Now that the printer and computer are connected, you’ll need to install the necessary printer drivers:
- Download Drivers: Visit the printer manufacturer’s website and download the latest drivers for your printer model. Make sure the drivers are compatible with your operating system.
- Install Drivers: Run the installation file and follow the on-screen instructions to install the printer drivers on your computer.
- Select Connection Type: During the installation process, you may be prompted to choose a connection type. Select “Ethernet” or “Wired Connection.”
5. Test the Connection
Once the drivers are installed, it’s time to test the connection:
- Print a Test Page: From your computer, navigate to the printer settings and select “Print Test Page.” This will confirm that the printer is communicating correctly with your computer via the Ethernet cable.
- Troubleshoot (if necessary): If the test page doesn’t print, check that the IP addresses match and that both the printer and computer recognize the Ethernet connection.
6. Configure Printer Sharing (Optional)
If you want to share the printer with other computers on your network, you can enable printer sharing on the computer that is connected to the printer:
- Enable Printer Sharing: On Windows, go to “Control Panel” > “Devices and Printers,” right-click on the printer, and select “Printer Properties.” Under the “Sharing” tab, check “Share this printer.” On a Mac, go to “System Preferences” > “Sharing” and check “Printer Sharing.”
- Connect Other Devices: Other computers on your network should now be able to connect to the shared printer, provided they are configured to use the same IP address range.
7. Maintenance and Considerations
- Monitor Connection Status: Regularly check the connection status to ensure that the printer is still communicating with your computer.
- Update Drivers: Keep the printer drivers up to date to avoid compatibility issues.
- Security: While a direct connection is more secure than a wireless connection, consider setting up a firewall or other security measures on your computer to protect against any unauthorized access.
Conclusion
Connecting a printer directly to a computer using an Ethernet cable without a router is a straightforward process that can provide added security, privacy, and simplicity. By carefully configuring the IP addresses and installing the correct drivers, you can ensure a stable and reliable connection. This method is particularly useful in environments where network security is paramount or where traditional networking equipment is unavailable.
FAQs
1. Can I connect any printer directly to a computer using an Ethernet cable?
Yes, as long as the printer has an Ethernet port, it can be connected directly to a computer via an Ethernet cable.
2. What if my computer doesn’t have an Ethernet port?
You can use an Ethernet to USB adapter to connect the Ethernet cable to a USB port on your computer.
3. How do I know if my printer has an Ethernet port?
Check the back of the printer for a port that resembles a larger phone jack or consult the printer’s manual.
4. Is this connection method faster than using a router?
Direct Ethernet connections can be faster and more stable because they avoid potential wireless interference.
5. Can I still use my printer wirelessly after connecting it via Ethernet?
If you disable the Wi-Fi on the printer, it will only work via the Ethernet connection.
6. What should I do if the printer doesn’t appear in the computer’s device list?
Ensure that both the computer and printer have IP addresses in the same range and that the Ethernet cable is securely connected.
7. Can I share the printer with other devices on the network?
Yes, you can enable printer sharing on the connected computer to allow other devices on the network to access the printer.
8. Do I need to configure the firewall for this connection?
It’s advisable to configure your firewall to allow communication through the Ethernet port to prevent any access issues.
9. Will this method work on both Windows and Mac computers?
Yes, the steps are similar for both Windows and Mac operating systems, though the specific menus and options may differ slightly.
10. What IP address range should I use?
Use a private IP address range, such as 192.168.1.x, where x is a unique number for each device on the network.